integrate includes various rule editors, including:
- Price File Editor
- Validation editor
- Timber Cutting List
- Estimated Labour Time
- Fitting Units (Installation Labour Time)
- Default Ironmongery
- Part Allocator
- Duplex Bar Selector
- Custom Rule editor (conditions in this editor are written differently from those in the other editors. Please see the separate article.)
There are differences between the different editors, but fundamentally they all work in the same way: the system checks each rule to see if its Condition is met, and if so, it performs a certain action. This article is intended to provide an introduction to working with rule editors, focusing on writing conditions and using variables.
Basics
- To start creating rules, you must have at least one Group (the exception is the Estimated Labour Time editor, which uses processes instead of groups). Groups are simply a way of organising rules. To create a new group, click the blue Groups button in the top right, type the name of the group, and click Add new. The number is the sort order: a lower number will make that group appear higher in the list.
- Rules are listed under their respective groups according to sort order.
-
-
-
- This is the loop that the rule triggers on (see below).
- This is the name of the rule.
- Every rule has a condition which decides when it triggers.
- Every rule performs some action when it triggers. This example is from the Default Ironmongery editor, so in this case the action is to add an ironmongery part to a drawing.
- The Edit, Copy, and Log buttons allow you to change a rule, duplicate it, or check the history of previous changes.
-
-
Loops
When you create a rule, you will need to decide which loop it should trigger on.
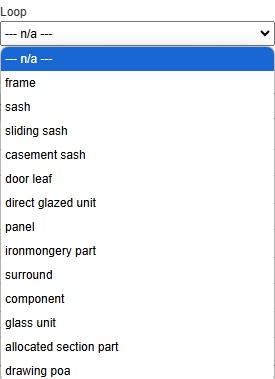
This determines how many times the system will "loop" through its code when checking if the condition in the rule is true. For example, a rule on the frame loop will be run once per frame, whereas a rule on the ironmongery part loop will be run once for each sash lift, pulley wheel, casement stay, etc. This allows the price file to add a charge for each piece of hardware on a drawing, or the timber cutting list to specify a piece of timber for each cill on a bay window. If n/a is selected, the rule is run on the item level, so will be checked once per item/drawing.
The list of available loops will be different in different editors.
Quote level rules
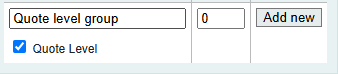
In the Price File and Validation editors, rules can be run at the quote level; this is effectively another loop above the item level, which is run once per quote. These rules must belong to a group specifically designated for quote level rules. A group can be marked as such using the tickbox when it is created or edited.
Rules can then be toggled to quote level:
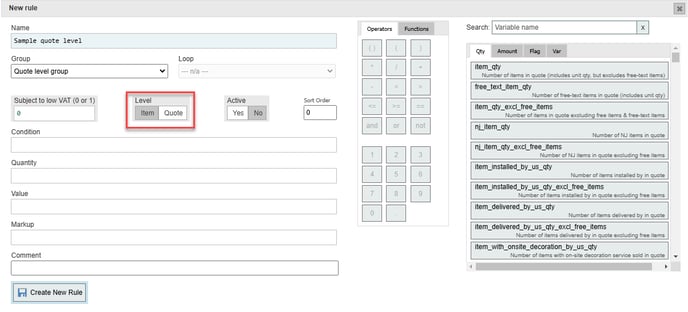
This loop contains variables which can check the number of items on the quote which meet certain criteria, such as the number of free-text items on the quote (free_text_item_qty).
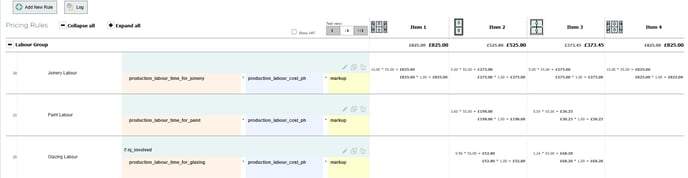
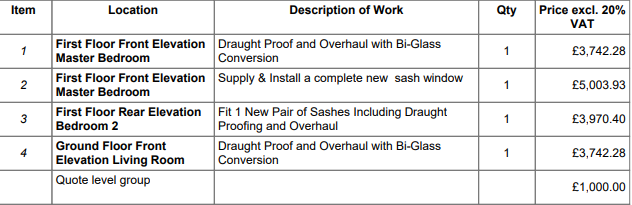
Quote level pricing groups are displayed as separate entries below the individual items on a quote:
Quote level validation messages appear on the Quote Matrix page: 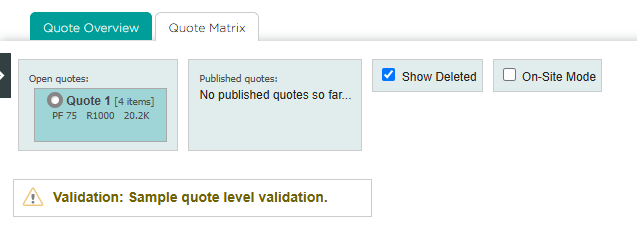
Conditions and variables
The next thing to specify is the condition, which decides when the rule will trigger. A condition consists of one or more expressions, each of which is evaluated as either True or False. Multiple expressions are combined using and/or operators. e.g.:
needs_draughtsealing and is_sw and frame_area < 2.0
Variables are essential for writing conditions, as they enable you to pull information from the drawing and check whether it meets certain criteria. Each expression is based around at least one variable. Different variables are available depending on which loop you select, and the same variable may refer to different values on different loops (e.g. area refers to frame area on the frame loop, and sash area on the sash loop). The two main types of variables are:
- Numerical (Qty/Amount): these variables return a number, for example frame area in square metres, or number of door leaves in a drawing. In expressions, numerical variables must be compared against another number (which could itself be a variable) using mathematical operators:
- == (equals. Note that double = must be used)
- + (plus)
- - (minus)
- * (multiplication
- / (division)
- < (less than)
- > (greater than)
- <= (less than or equal to)
- > (greater than or equal to)
- () (brackets)
- Flags: these check whether something is True or False, for example whether a sash opens. They normally have the word "is" at the start of the variable name (e. g. is_opening). Flags cannot be combined with numerical values; a flag variable by itself is a complete expression.
Combining and negating expressions
integrate recognises three logical operators:
- and allows multiple expressions to be combined. They must all return true for the condition to trigger.
- or allows multiple expressions to be combined. Only one needs to return true for the condition to trigger. or statements should be enclosed within brackets to separate them from the rest of the condition.
- not negates the following operator or expression. For example, not is_installation_included would return true on a supply only job, and sash_thickness not == 48 would return true if the sash thickness was anything other than 48mm.

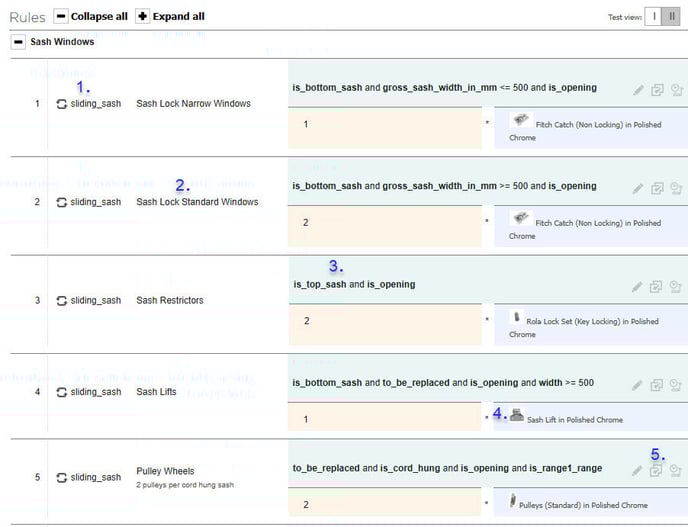
The above example, on the sliding sash loop, uses four variables in order to assign one sash lift to a pair of sashes if certain conditions are met:
- is_bottom_sash is a flag, so it can't be combined with any numerical value; it can only be either true or false. This variable returns true when the sash being checked is the bottom sash of a sliding pair. On a single pair of sashes, rules on the sliding sash loop will be checked twice (once for each sash), but is_bottom_sash will trigger only once.
- to_be_replaced is a flag variable which returns true if the sliding sash is set to be replaced, so the rule would not trigger for repair jobs.
- is_opening is another flag which returns true if the sash is set to opening. You could achieve exactly the same thing using not is_fixed instead of is_opening.
- width is an amount variable. Since it is used on the sliding sash loop, it returns the width of the sash in mm. width >= 500 means the rule will only trigger if the sash width is greater than or equal to 500mm.
Brackets
For more complex conditions using longer calculations or a combination of or/and statements, you will need to use brackets. The contents of brackets are always evaluated first, and the result of that calculation is treated as an individual expression.

The above example on the frame loop is designed to trigger for oak single doors with no toplight or sidelight. The first set of brackets checks that the sash quantity plus the direct glazed unit quantity is exactly 1, thus excluding double doors, and single doors with a toplight or sidelight. The second set of brackets takes into account the fact that several oak options are available in the system. If any of these are selected for the door leaf material, the bracketed section will return True.

The above example on the casement sash loop is designed to trigger for fixed casements that have a frame area between 0.9 and 1 m2. Since we are on the casement sash loop, area will calculate the sash area, not the frame area, so instead we use a formula inside brackets to calculate the frame height, another to calculate frame width, and then multiply them together to calculate frame area in mm2.
Conditional outputs
Flag variables can be combined with a question mark to return two possible values for a rule based on whether the variable returns true or false. The syntax is variable?x:y, where x is the output if the variable returns true, and y is the output if the variable returns false.
For example, suppose you had two ranges, Classic and Bespoke, and wanted a different markup for each. One way to do this would be to have separate pricing rules for each range, but this means that you would need to double the total number of pricing rules. A better way would be to add a conditional statement to the markup section of each pricing rule:
is_bespoke_range?3.5:2.5
The value here will be 3.5 when the Bespoke range is selected, and 2.5 the rest of the time.
Custom variables
Custom variables allow you to insert a customisable figure into multiple rules; then in the future you can easily update multiple rules at once just by changing the variable. For example, in the price file, instead of inserting a numerical markup figure into each rule, you could create a custom variable called markup. Then if you need to adjust this figure you just have to edit the markup variable instead of hundreds of pricing rules. Please note that after adjusting a custom variable, you will need to publish a new price file for the change to take effect.
The other use for custom variables is to to add free text to conditions. The conditions field only accepts numbers, functions, mathematical/logical operators, and variables, so if you need a condition to check for accoya frames, frame_material == accoya will not normally work, because "accoya" is not a variable recognised by the system:
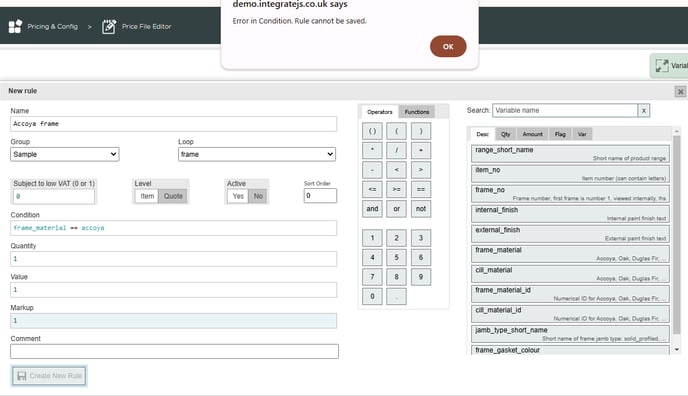
However if you create a custom variable called accoya, and set the value of this variable to "accoya", the rule will save.
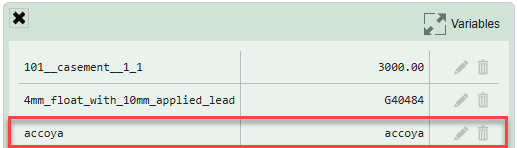

This is because the condition editor cannot read text directly, but it can check the contents of the variable called accoya and read the text from that.
Custom variables can also contain a list of figures separated by commas, which can be used with the contains() and in_list() functions (see below).
Functions
- round(A, B): rounds A to B decimal places.
- round_up_to_nearest(A, B): rounds A up to nearest multiple of B, where B is an integer.
- min(A, B): returns the lowest value out of A and B.
- max(A, B): returns the highest value out of A and B.
- ceil(A): rounds up to the nearest integer.
- floor(A): rounds down to the nearest integer.
- contains(A, B): checks if text in variable A contains any of the items in variable B. This doesn't have to be an exact match: e.g. the phrase "Lead weight" contains the text "weight". B can be a single value or a list of values separated by commas.
- Example: imagine you want to write a pricing rule to add an uplift for any window painted in black. First, we create a custom variable in the Price File editor called black_finish, and set the value of that variable to "black":

Then, write a rule on the item-level loop using this condition:
This will trigger if either the internal or external finish contains any of the text in the variable black_finish. Since we have just set this variable to "black", the rule will trigger if the internal or external finish contains the word "black".
- Example: imagine you want to write a pricing rule to add an uplift for any window painted in black. First, we create a custom variable in the Price File editor called black_finish, and set the value of that variable to "black":
- in_list(A, B): checks if text in variable A matches any of the items in variable B exactly. B can be a single value or a list of values separated by commas.
- Example: imagine you want to write a pricing rule for vacuum glazing, but there are several types of vacuum glass in your part list. First, create a custom variable in the Price File editor for vacuum_glazing, and add the part numbers for each type of vacuum glass, separated by commas:

Then you can write a pricing rule, on the glass unit loop, using this condition:
The rule triggers if the glass unit is single glazed, and if its glass part number matches any of the values in the list called vacuum_glazing.
- Example: imagine you want to write a pricing rule for vacuum glazing, but there are several types of vacuum glass in your part list. First, create a custom variable in the Price File editor for vacuum_glazing, and add the part numbers for each type of vacuum glass, separated by commas:
- abs(A): converts negative numbers to positive numbers, while positive numbers remain the same.
- empty(A): returns True if variable A is empty.
- concatenate(A, B, C...): glues several textual variables together to make a new variable. May be useful in conjunction with contains().
- lowercase(A): converts variable A to lowercase.
Testing rules
Each editor allows you to test your rules using a sample quote and/or order. Input the details of your desired sample quote/order at the top of the page, then click Save. 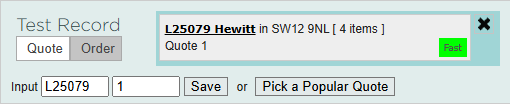
You can then see whether each rule triggers for each item, and depending on the editor, what value is calculated.