Video Guide: Setting Up Sash Weight Allocation
This video shows how to add lead or steel parts and allocate them to drawings.
Key Points: Setting Up Sash Weight Allocation
1. Add weights to the system.
Add sash weights to the system before assigning any rules to allocate sash weights. Navigate to integrateBUILD, then pricing and config, then part list.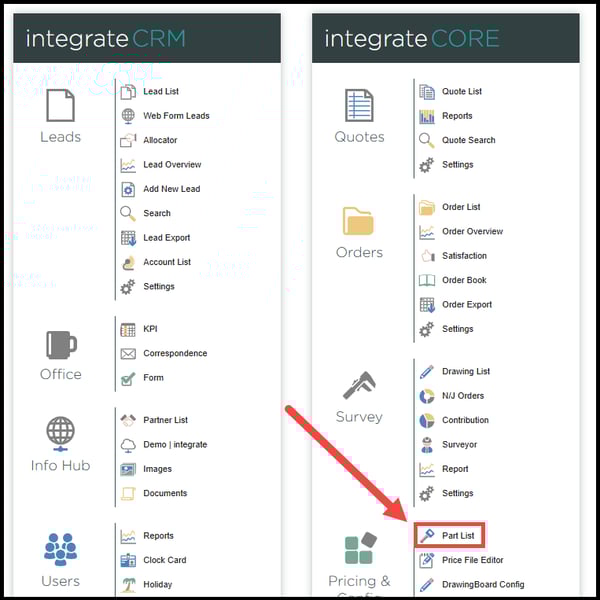
2. Add parts.
Select the sash weight tab at the top of the screen. From the sash weight page click + add part button.

3. Add weight details.
Add the following part details for the weight:
a. Part Number - Unique identifier for the part in the system, for example, LB3030.
b. Part Name - Name of the part, for example, 30 x 30 mm Lead Bar.
c. Purchase UOM - Unit of measurement, for example, KG or LB.
d. Cost - How much the part costs by weight per UOM, for example, £2.50 per KG.
e. Material - Select if the weight is lead or steel.
f. Shape - Select if the weight is rectangular, round, or square.
g. Dimension - Physical size of the weight, for example, 30 mm.
h. Has Hole - Set if the weight has a hole running through the length of it.
4. Create new part.
Once details of the part have been completed, click the create new part button, in the bottom right of the new part box, to add the new part to the system.
Note: After adding new parts, it will be necessary to update the price file containing the new parts. This can be done via the 'Price File Editor' from the main page or in your browser you can go to: https://yourdomain/PricingAndConfig/PriceFileEditor

Key Points: Writing Allocation Rules
1. Navigate to DrawingBoard config.
From the main integrateBUILD page, navigate to pricing & config. then DrawingBoard config.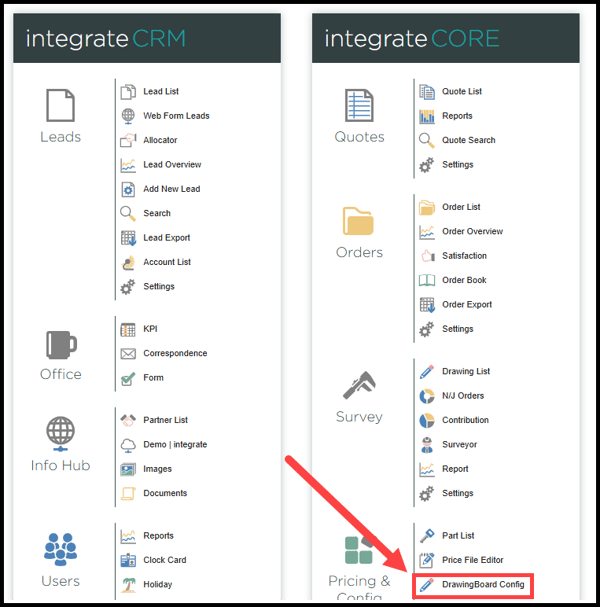
2. Navigate to part allocator.
On the pricing & config page, select the part allocator tab.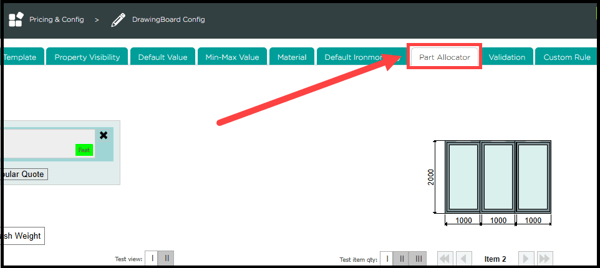
3. Create a group.
Note: At least one group needs to be created in the system to write a rule.
To create a new group, click the groups button, in the top right of the screen, enter the name of the group and assign a sort weight. Click add new to complete the process.

4. Create a new rule.
Click the + create new rule button, on the left-hand side of the screen to create a new rule.
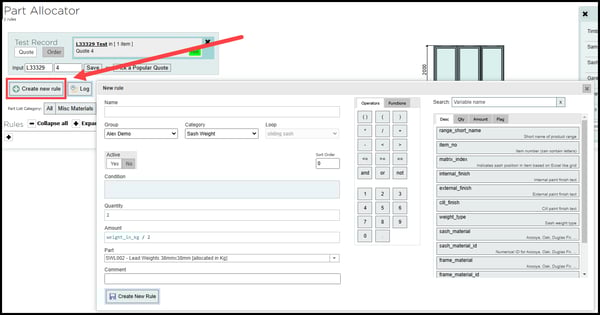
5. Write an allocation rule.
Start by naming the rule with relevant information, for example, 45 mm Sash Thickness or 50 mm Lead Weight.
From group drop down, select the group created in the previous step, set the category to sash weight.
Set the sort number - the lower the number, the closer the rule is to the top of the list. Set the rule to active.
6. Define the conditions of the rule.
Note: The condition tells the system how to assign the weight, and is typically based on sash thickness, weight in kg, or both.
Write the condition based on the following variables:
a. New windows - For new windows, start the condition is_complete_new.
b. Existing windows - If it's not a new window, do not start with is_complete_new.
c. Replacing sashes only - If only the sashes are being replaced, not the frames, start the condition with is_to_be_replaced.
d. Compare against sash thickness, weight, or both - Compare sash_thickness, weight_in_kg', or both using lesser than or greater than symbols (> < >= <=). For example, sash_thickness >= 48, when sash thickness is greater than or equal to 48 mm.
e. Cord or chain - Include is_cord_hung or is_chain_hung.
f. Additional variables - Include variables such as is_sibling_fixed to check if there is a fixed sash and apply differing weights.
Example Condition:
Both Sash Thickness and Weight
![]()
7. Assign number of weights.
One the condition has been created. allocate the required number of weights in quantity. For example, in the amount field enter weight_in_kg /2. Finally, in the part section select the weight part added in the setting up sash weight allocation section of this guide.

8. Add the new rule.
Once happy with the new rule, click the create new rule button to add to the system.