Key Points: Drawing Rake Windows
1. Find the rake frame property.
When working with non-square frame dimensions within the drawing board, the rake frame property must be enabled. Navigate to the frame category, ensure the box for rake frame property is ticked or highlighted.

2. View property fields.
Once the rake frame option has been selected, 5 new property fields will be shown.
3. Customise the frame for non-standard dimensions.
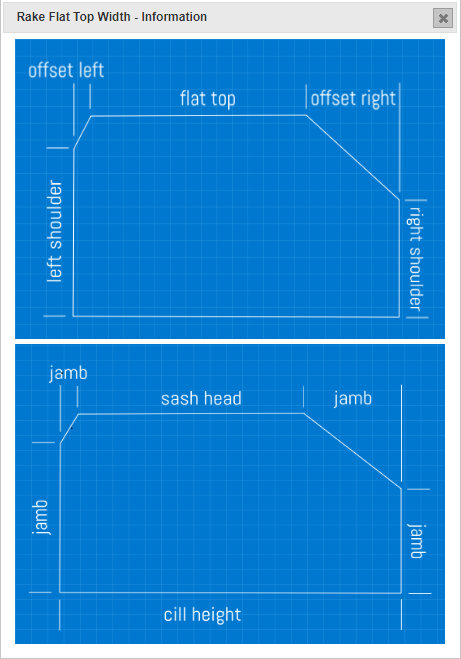
Use the left & right shoulder height properties to modify the side lengths of the frame on the drawing board.

4. Modify elevation of the left or right shoulder.
Adjust the right shoulder height to modify the elevation of the right shoulder. Adjust the left shoulder height to modify the left shouler.

5. Adjust the top rail width.
Use the rake flat top width property to adjust the width of the top rail of the frame.

6. Select the frame head size.
Tick the box for rake to be head, if the frame head should use the head size of the frame. Untick if the frame head should use the jamb size.
7. Revealing the blueprint diagram.
Clicking the ![]() icon will reveal a blueprint diagram illustrating how the various properties impact the frame's design.
icon will reveal a blueprint diagram illustrating how the various properties impact the frame's design.