Key Points: Editing or Adding Lead Stages or Status
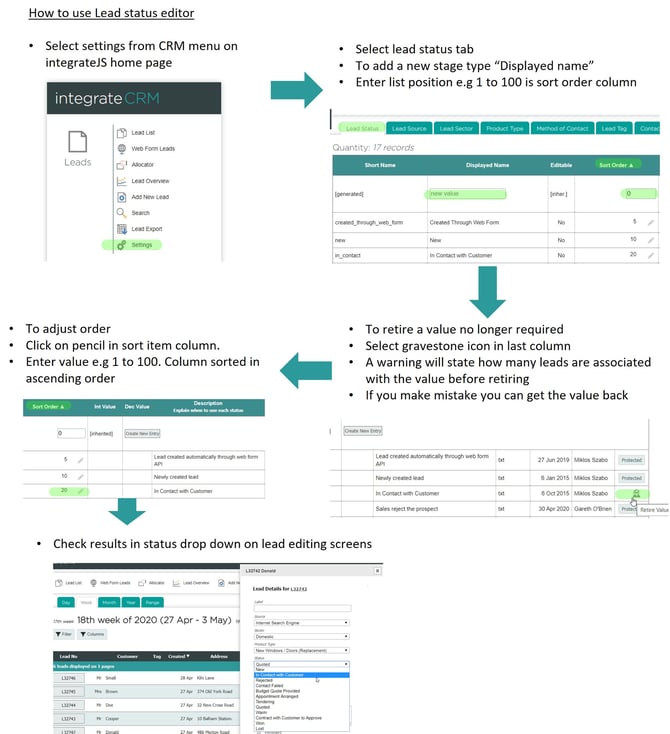
1. Open the lead status editor.
From integrateCRM home page, open the CRM menu and select settings.
2. Add a new lead stage.
a. Select the lead status tab.
b. In the display name field, enter the name of the new stage.
c. Set the sort order to determine the display order of the options.
3. Retire a lead stage.
a. Locate the stage you want to retire.
b. Click the gravestone icon in the last column.
c. A warning will show how many leads are currently using this stage.
d. If required, retired values can be reinstated later.
4. Reorder lead stages.
a. Click the pencil icon in the sort order.
b. Enter a number between 1 and 100.
c. Stages display in ascending order (1 = highest).
5. Check the updated order.
Open any lead and check the status dropdown to confirm the new order.
Note: Certain stages are system-required. For example, when a quote is published, integrateCRM automatically prompts whether the lead should be updated to quoted.